


I am so excited for today’s hair tutorial because we are going to recreate these cute trendy summer hairstyles that are perfect for medium and long hair. We are bringing it back to the roots of this channel, how it all began.
The first hairstyle is a braided half-up hairstyle with a bun. Second, is an effortless half up half down bubble braid, and finally a loose and voluminous topsy tail ponytail (my favourite). These hairstyles will look amazing at any event this summer, from a casual beach day to a glamorous wedding.
Don’t forget to leave a comment and let me know which hairstyle you liked the best!
HOW TO ACHIEVE THESE 3 CUTE SUMMER HAIRSTYLES
PREP:
Step 1: For an effortless appearance curl your hair with a 1.25” curling iron. This one from T3 Micro is my favourite.
Step 2: Apply dry shampoo all over your hair to add more volume and hold. Lately, I’ve been using a new dry shampoo + conditioner from Voir Haircare, it leaves my hair feeling so clean!
Step 3: Work a small amount of texture powder into your curls to help separate them and add more texture.
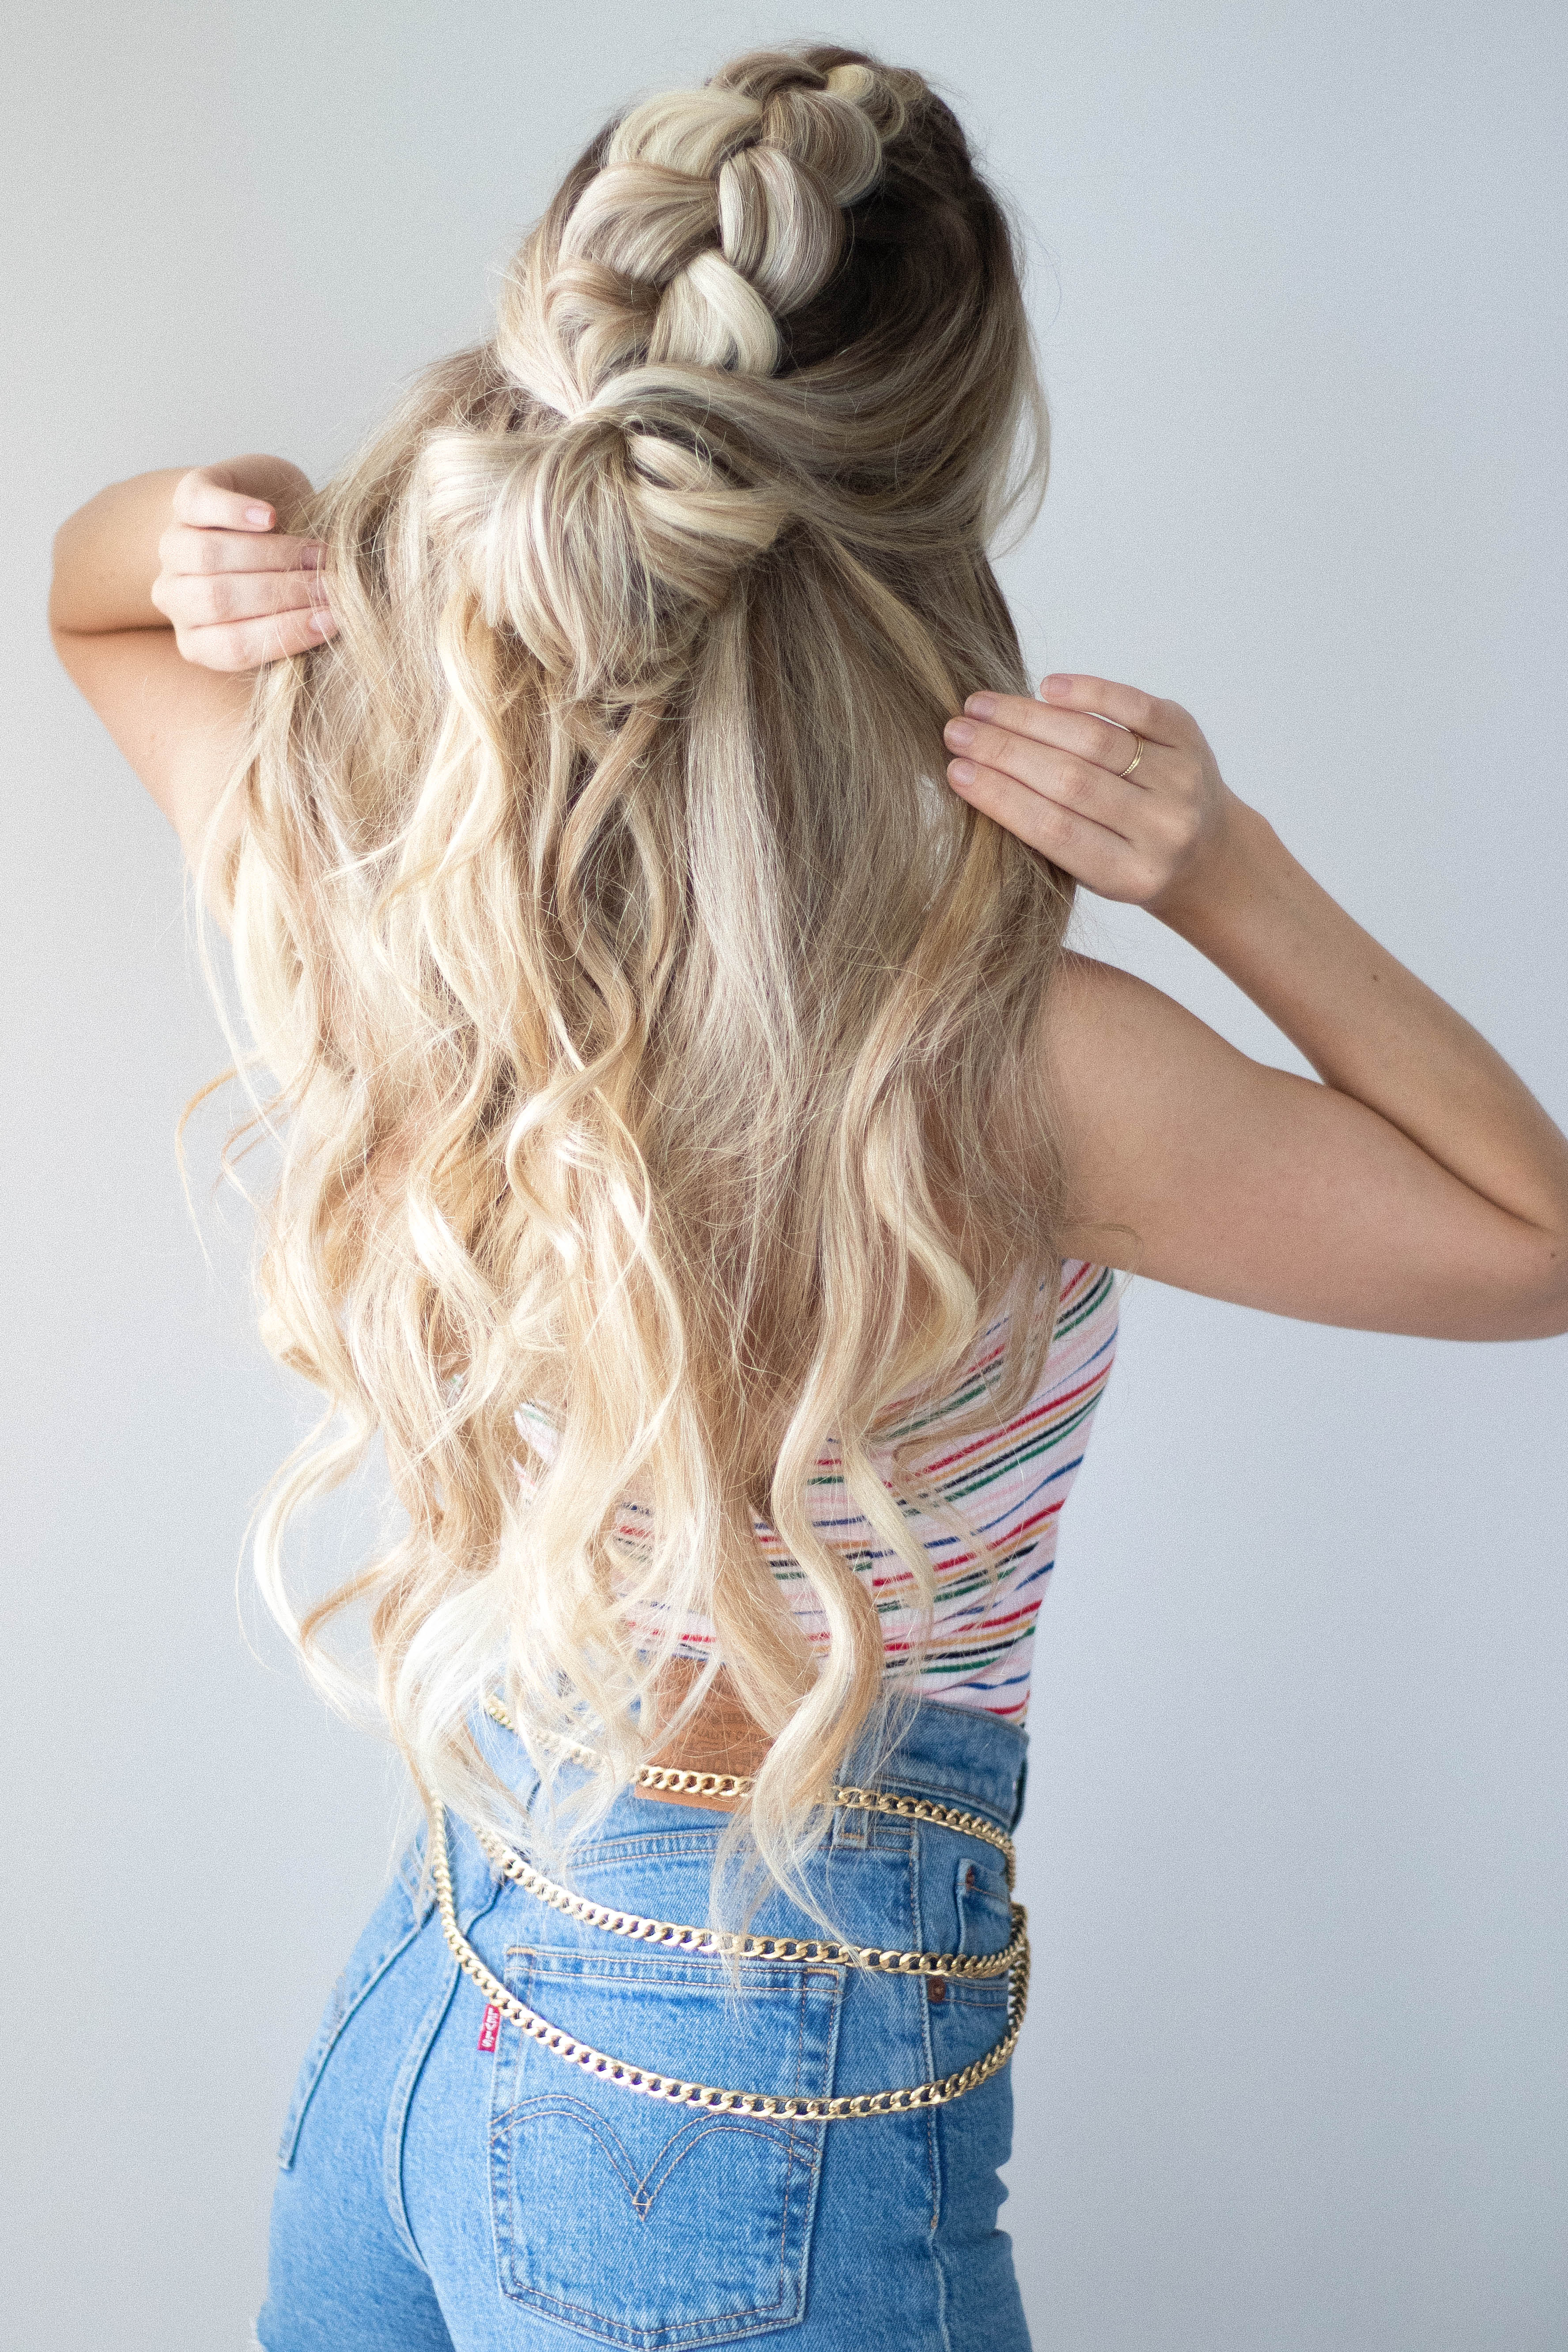
Half-up Braided Hairstyle:
Step 1: Gather about a 1-inch section at the front of the top of your head. If you’re clipping in hair extensions, flip this section forward and clip your extension underneath.
Step 2: Divide the front section into 3 equal pieces.
Step 3: Create the base for the dutch braid by crossing the outside right piece underneath the middle piece, and then crossing the outside left piece underneath the middle piece.
Step 4: To dutch braid, repeat the same pattern, except add 1” sections of hair from the top section of your head into the outside piece before crossing it underneath the middle piece.
Step 5: Continue dutch braiding all the hair at the top of your head, don’t worry about being to particular, an undone and effortless look is the way to go for summer.
Step 6: Clip off the ends to secure it for now.
Step 7: Gently pinch the outside of each part of the braid and give it a little pull. This is my favourite part because it transforms the whole look, and makes your braid stand out, this will also hide the extension.
Step 8: Secure the bottom of your braid with a hair elastic.
Step 9: Gather all the hair above your ears on both sides of your head, leaving down some hair to frame your face, & leaving out enough hair to cover your ears will give a more boho appearance. Then twist these 2 sections away from your face 1-2 times.
Step 10: Secure your 2 sections, and your braid together with a hair elastic, and on the last loop only pull your hair halfway through to create a bun. Pinch and pull on your bun to loosen it up and give it that lived in look.
Step 11: Finish off the hairstyle by grabbing a small piece of hair and wrapping it around your hair elastic, and then secure it to the underside with a bobby pin. You could also add a cute scrunchie or a scarf.
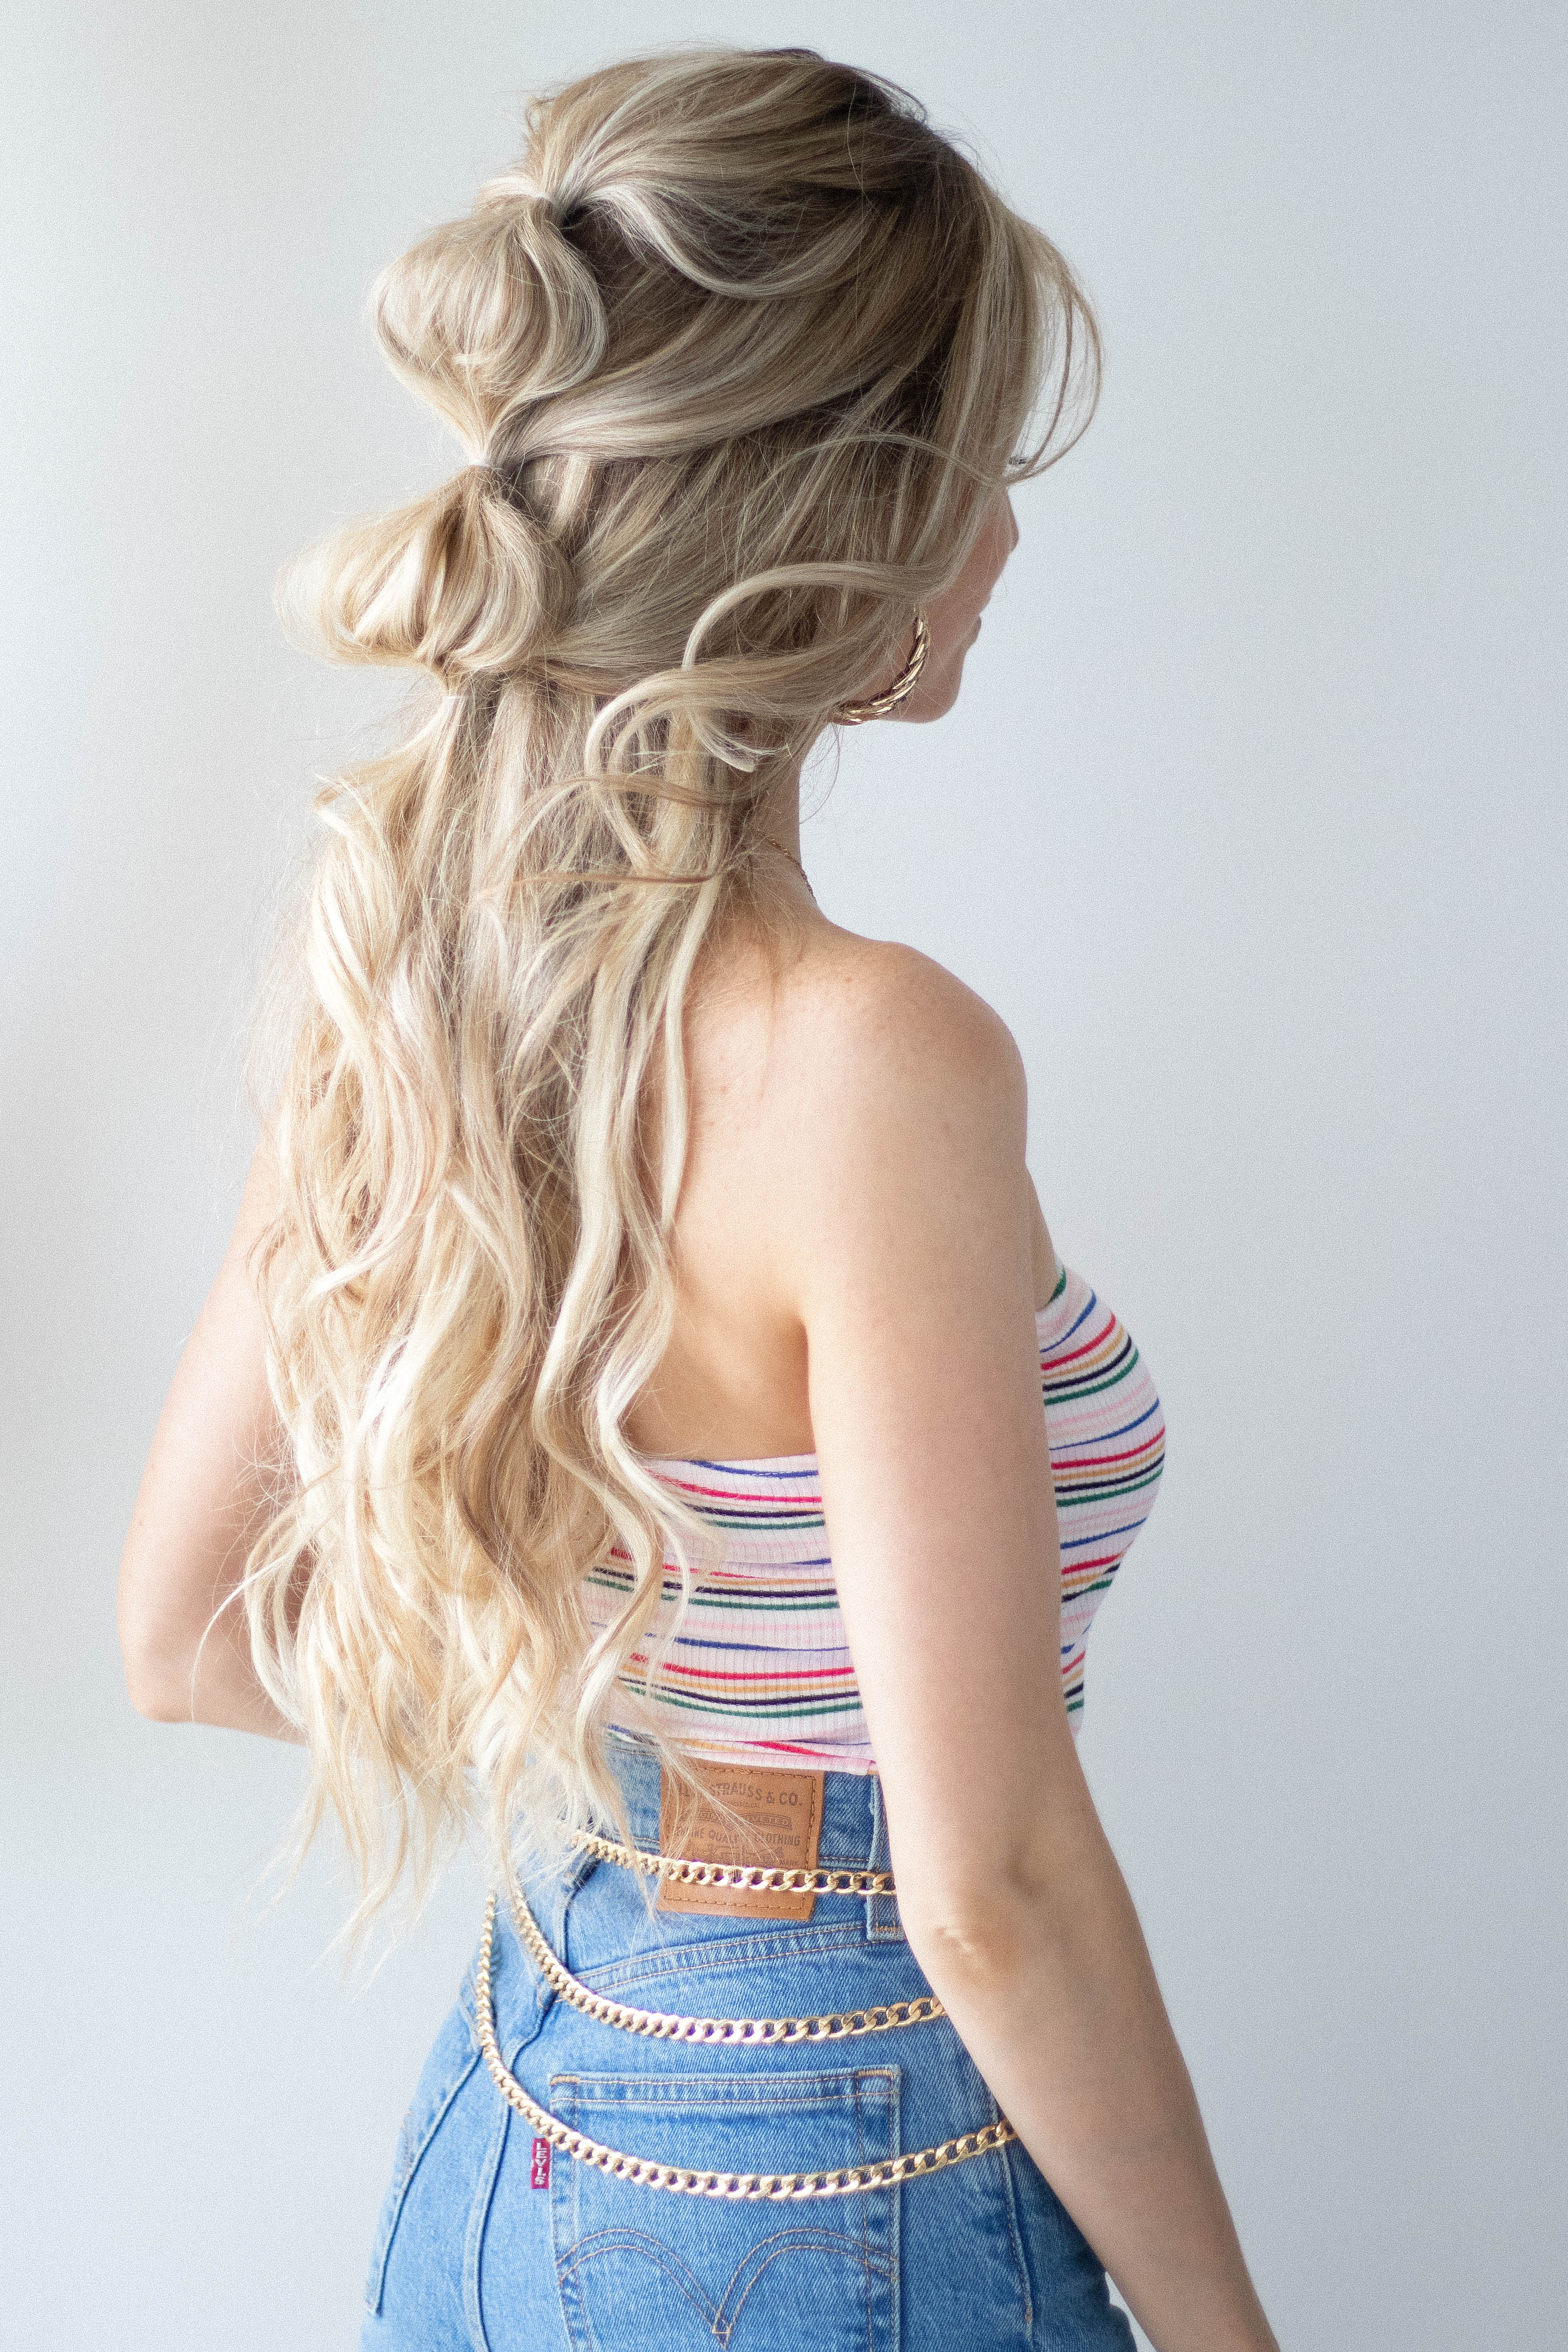
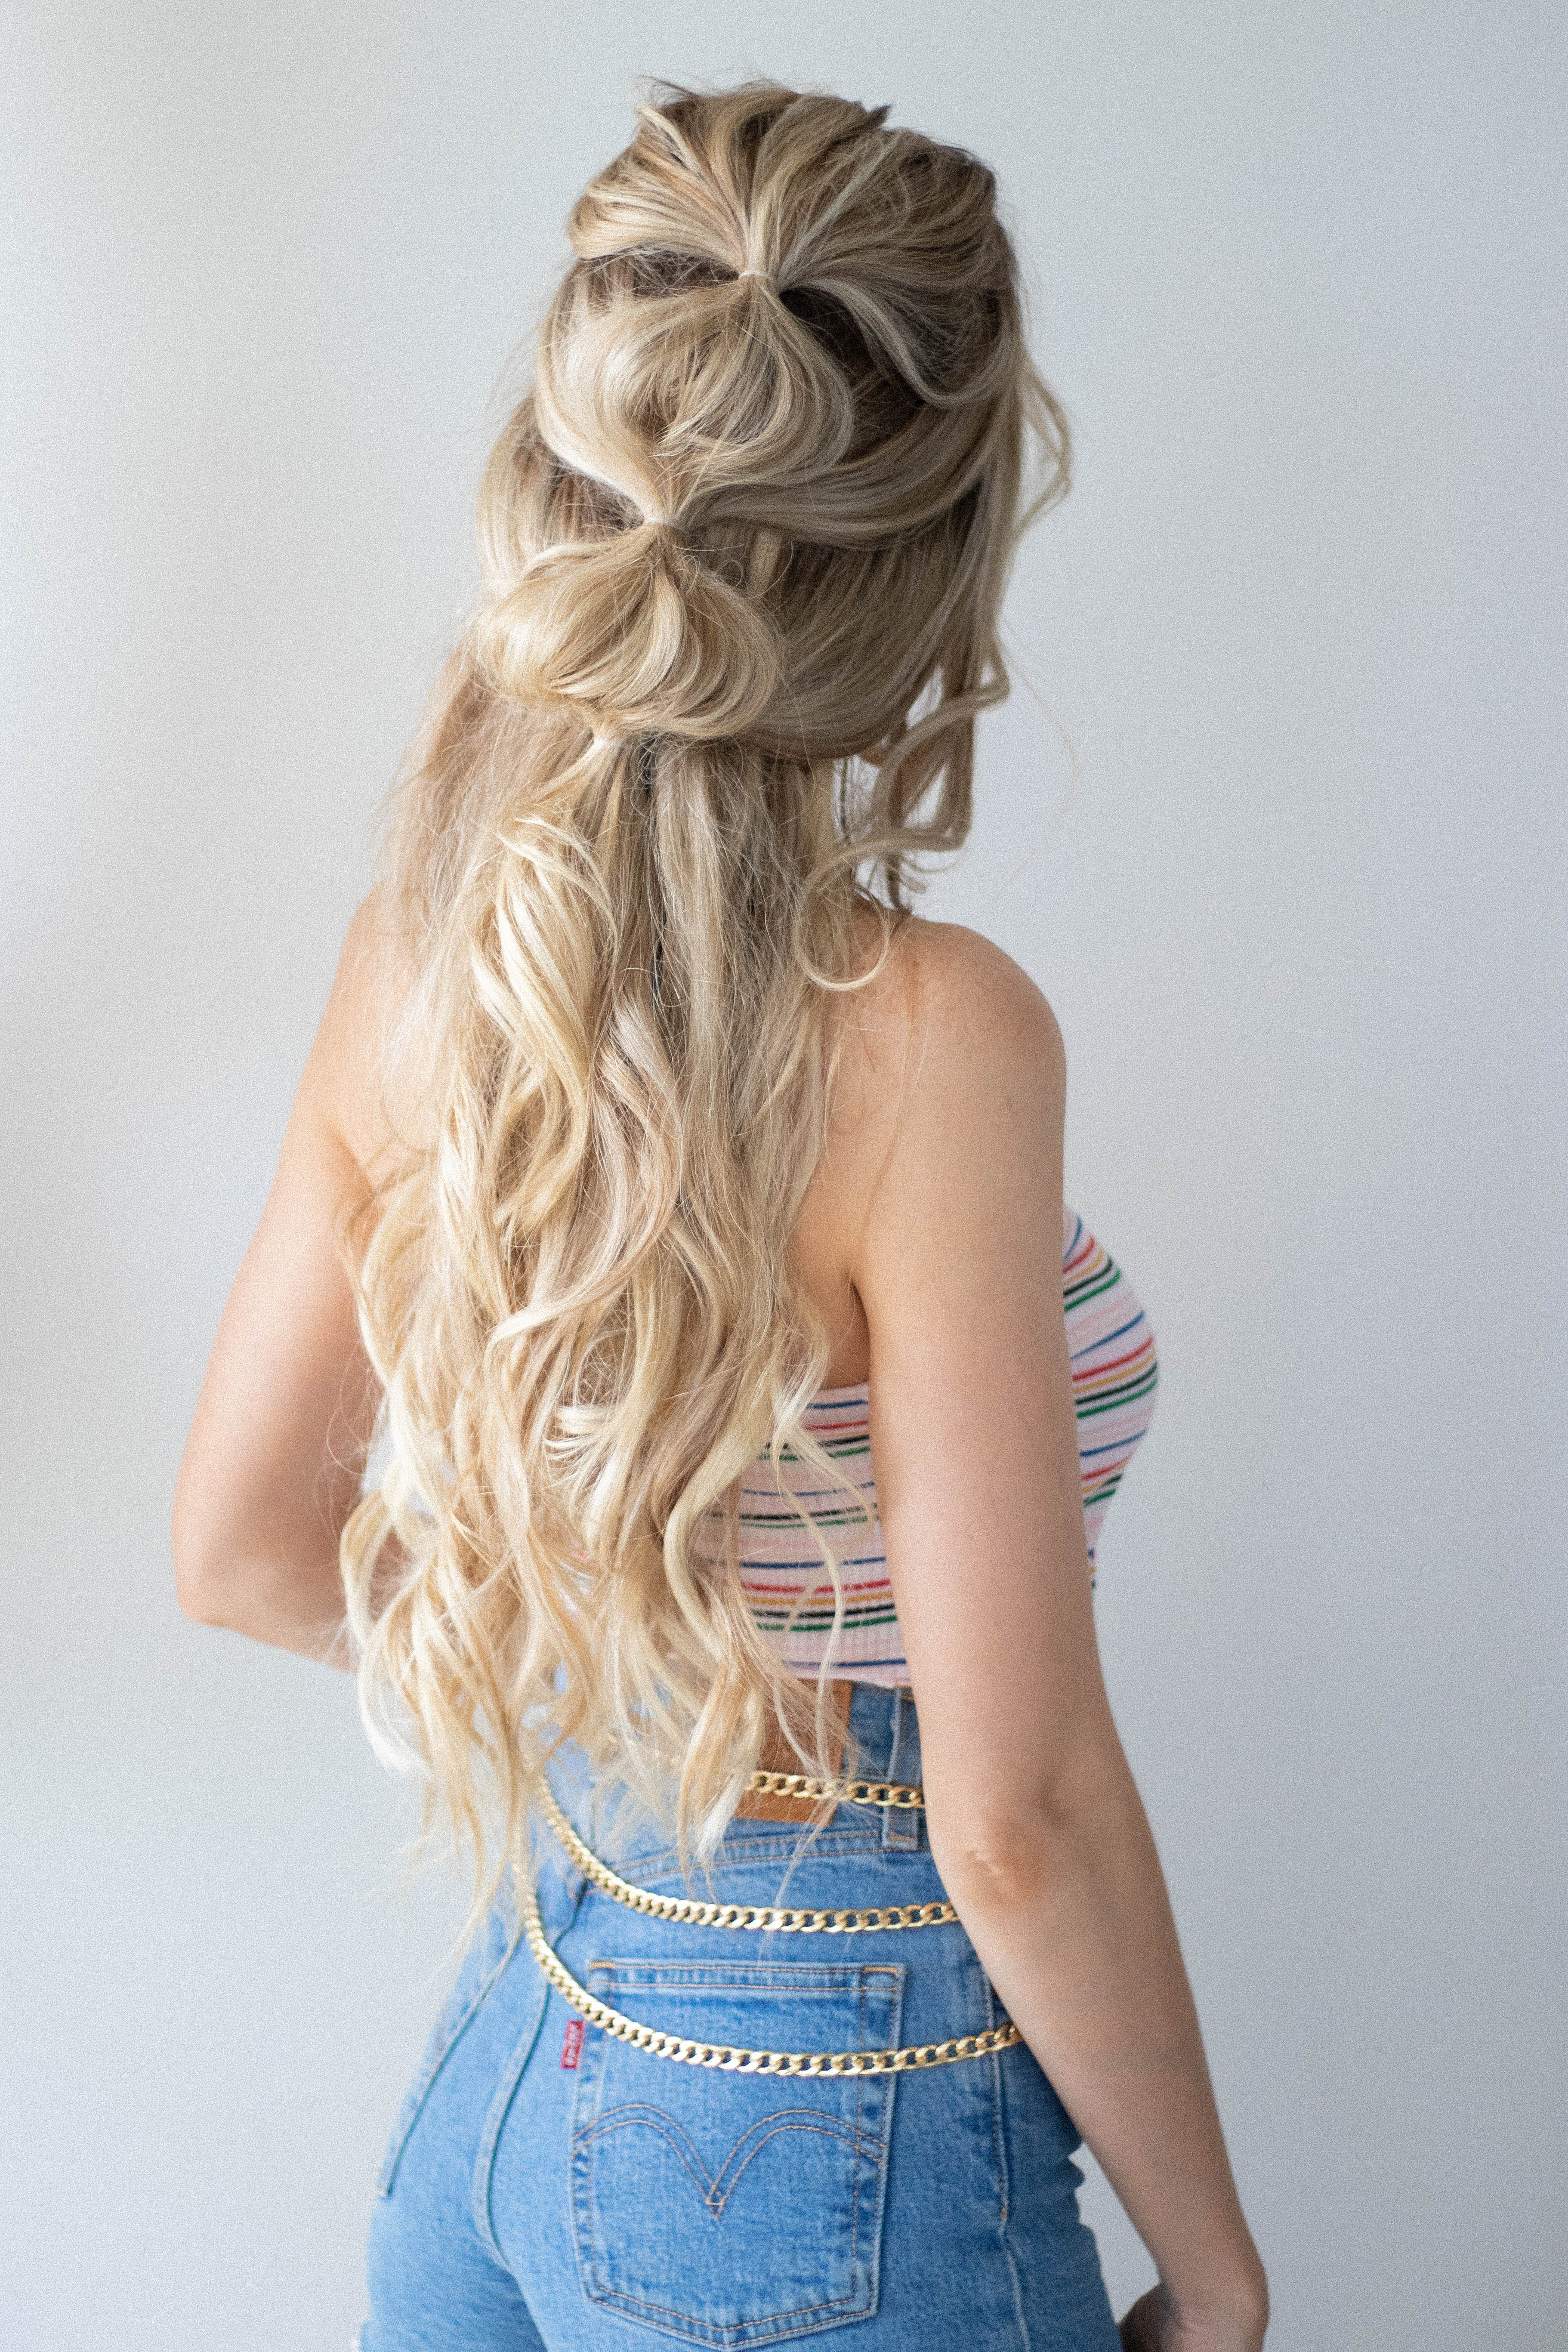
Effortless Bubble Braid:
Step 1: Gather all the hair at the top of your head, and secure it with a hair elastic. Pinch and pull on the hair around your crown to create that effortless appearance.
Step 2: On the left side gather all the hair just below your temples leaving down enough hair to cover your ears, and then repeat on the right side.
Step 3: Gather your two sections, and the pony-tail you created earlier & join them all together, and then secure them together tightly with a hair elastic.
Step 4: Gently pull the sides of the middle section to create the bubble. Be sure to pull on all sides, the front and back, to give it that nice full look.
Step 5: To create another bubble, repeat the same steps, this time loosely gathering all the hair above your ears, leaving out any small pieces to frame your face.
Step 6: Repeat steps 3 and 4 and your bubble braid is complete.
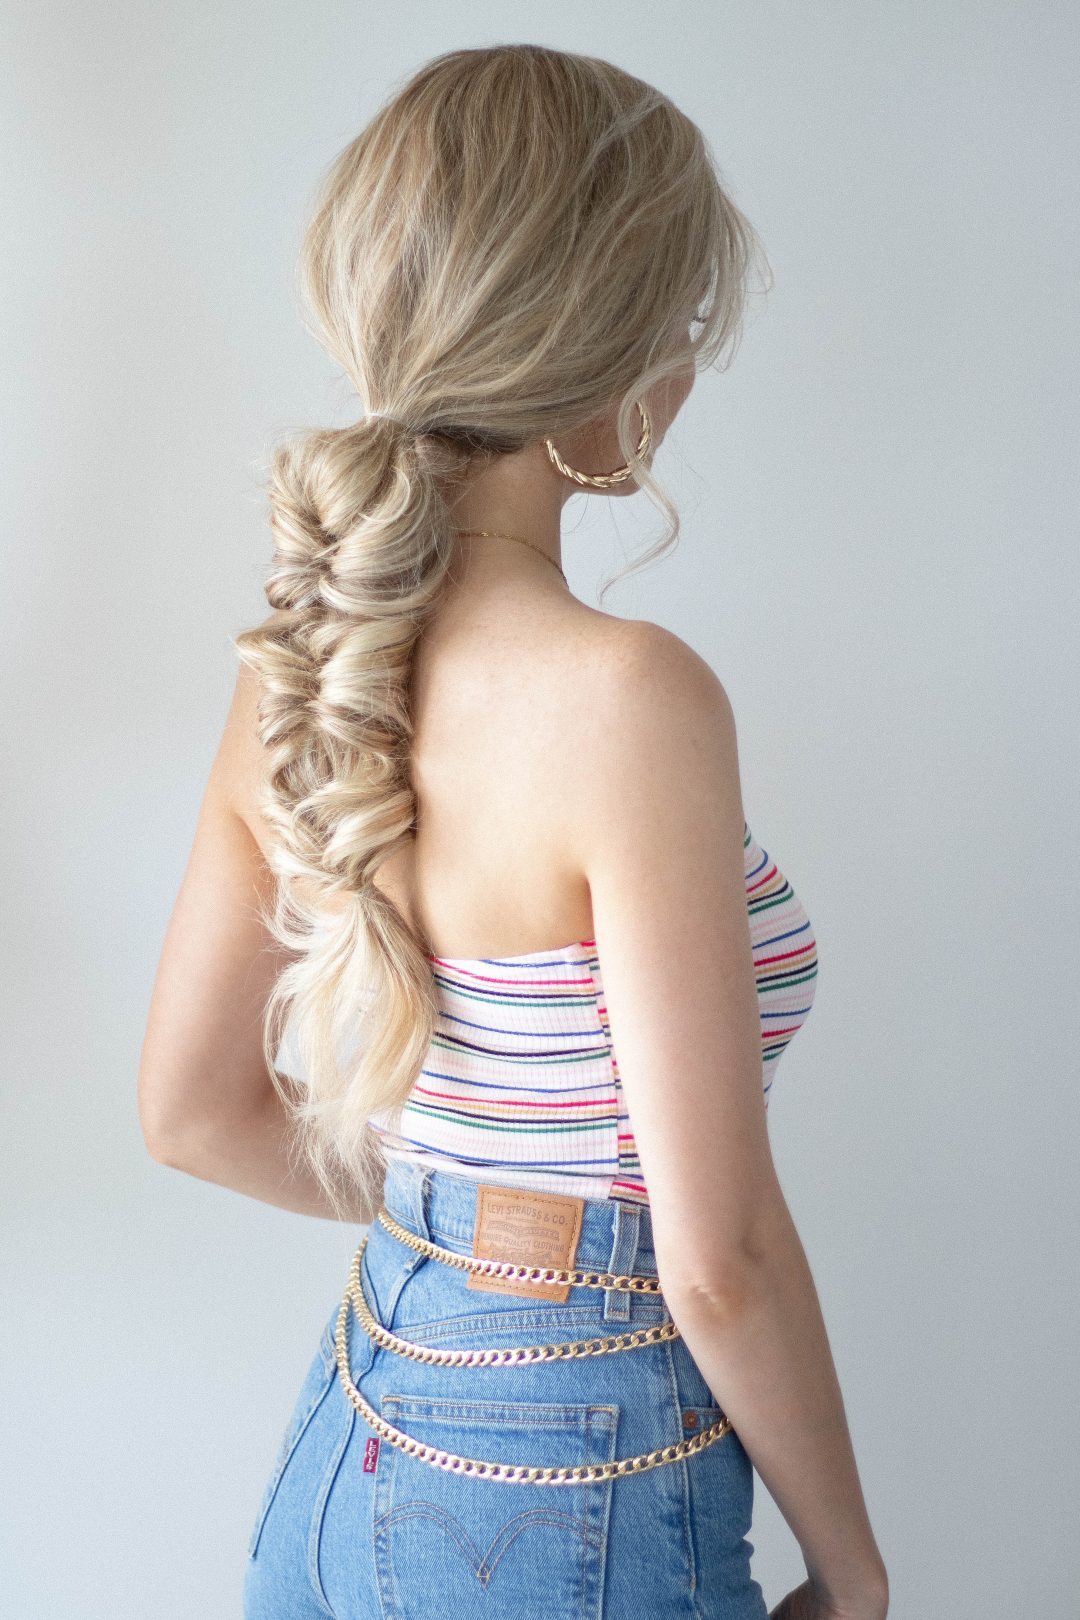
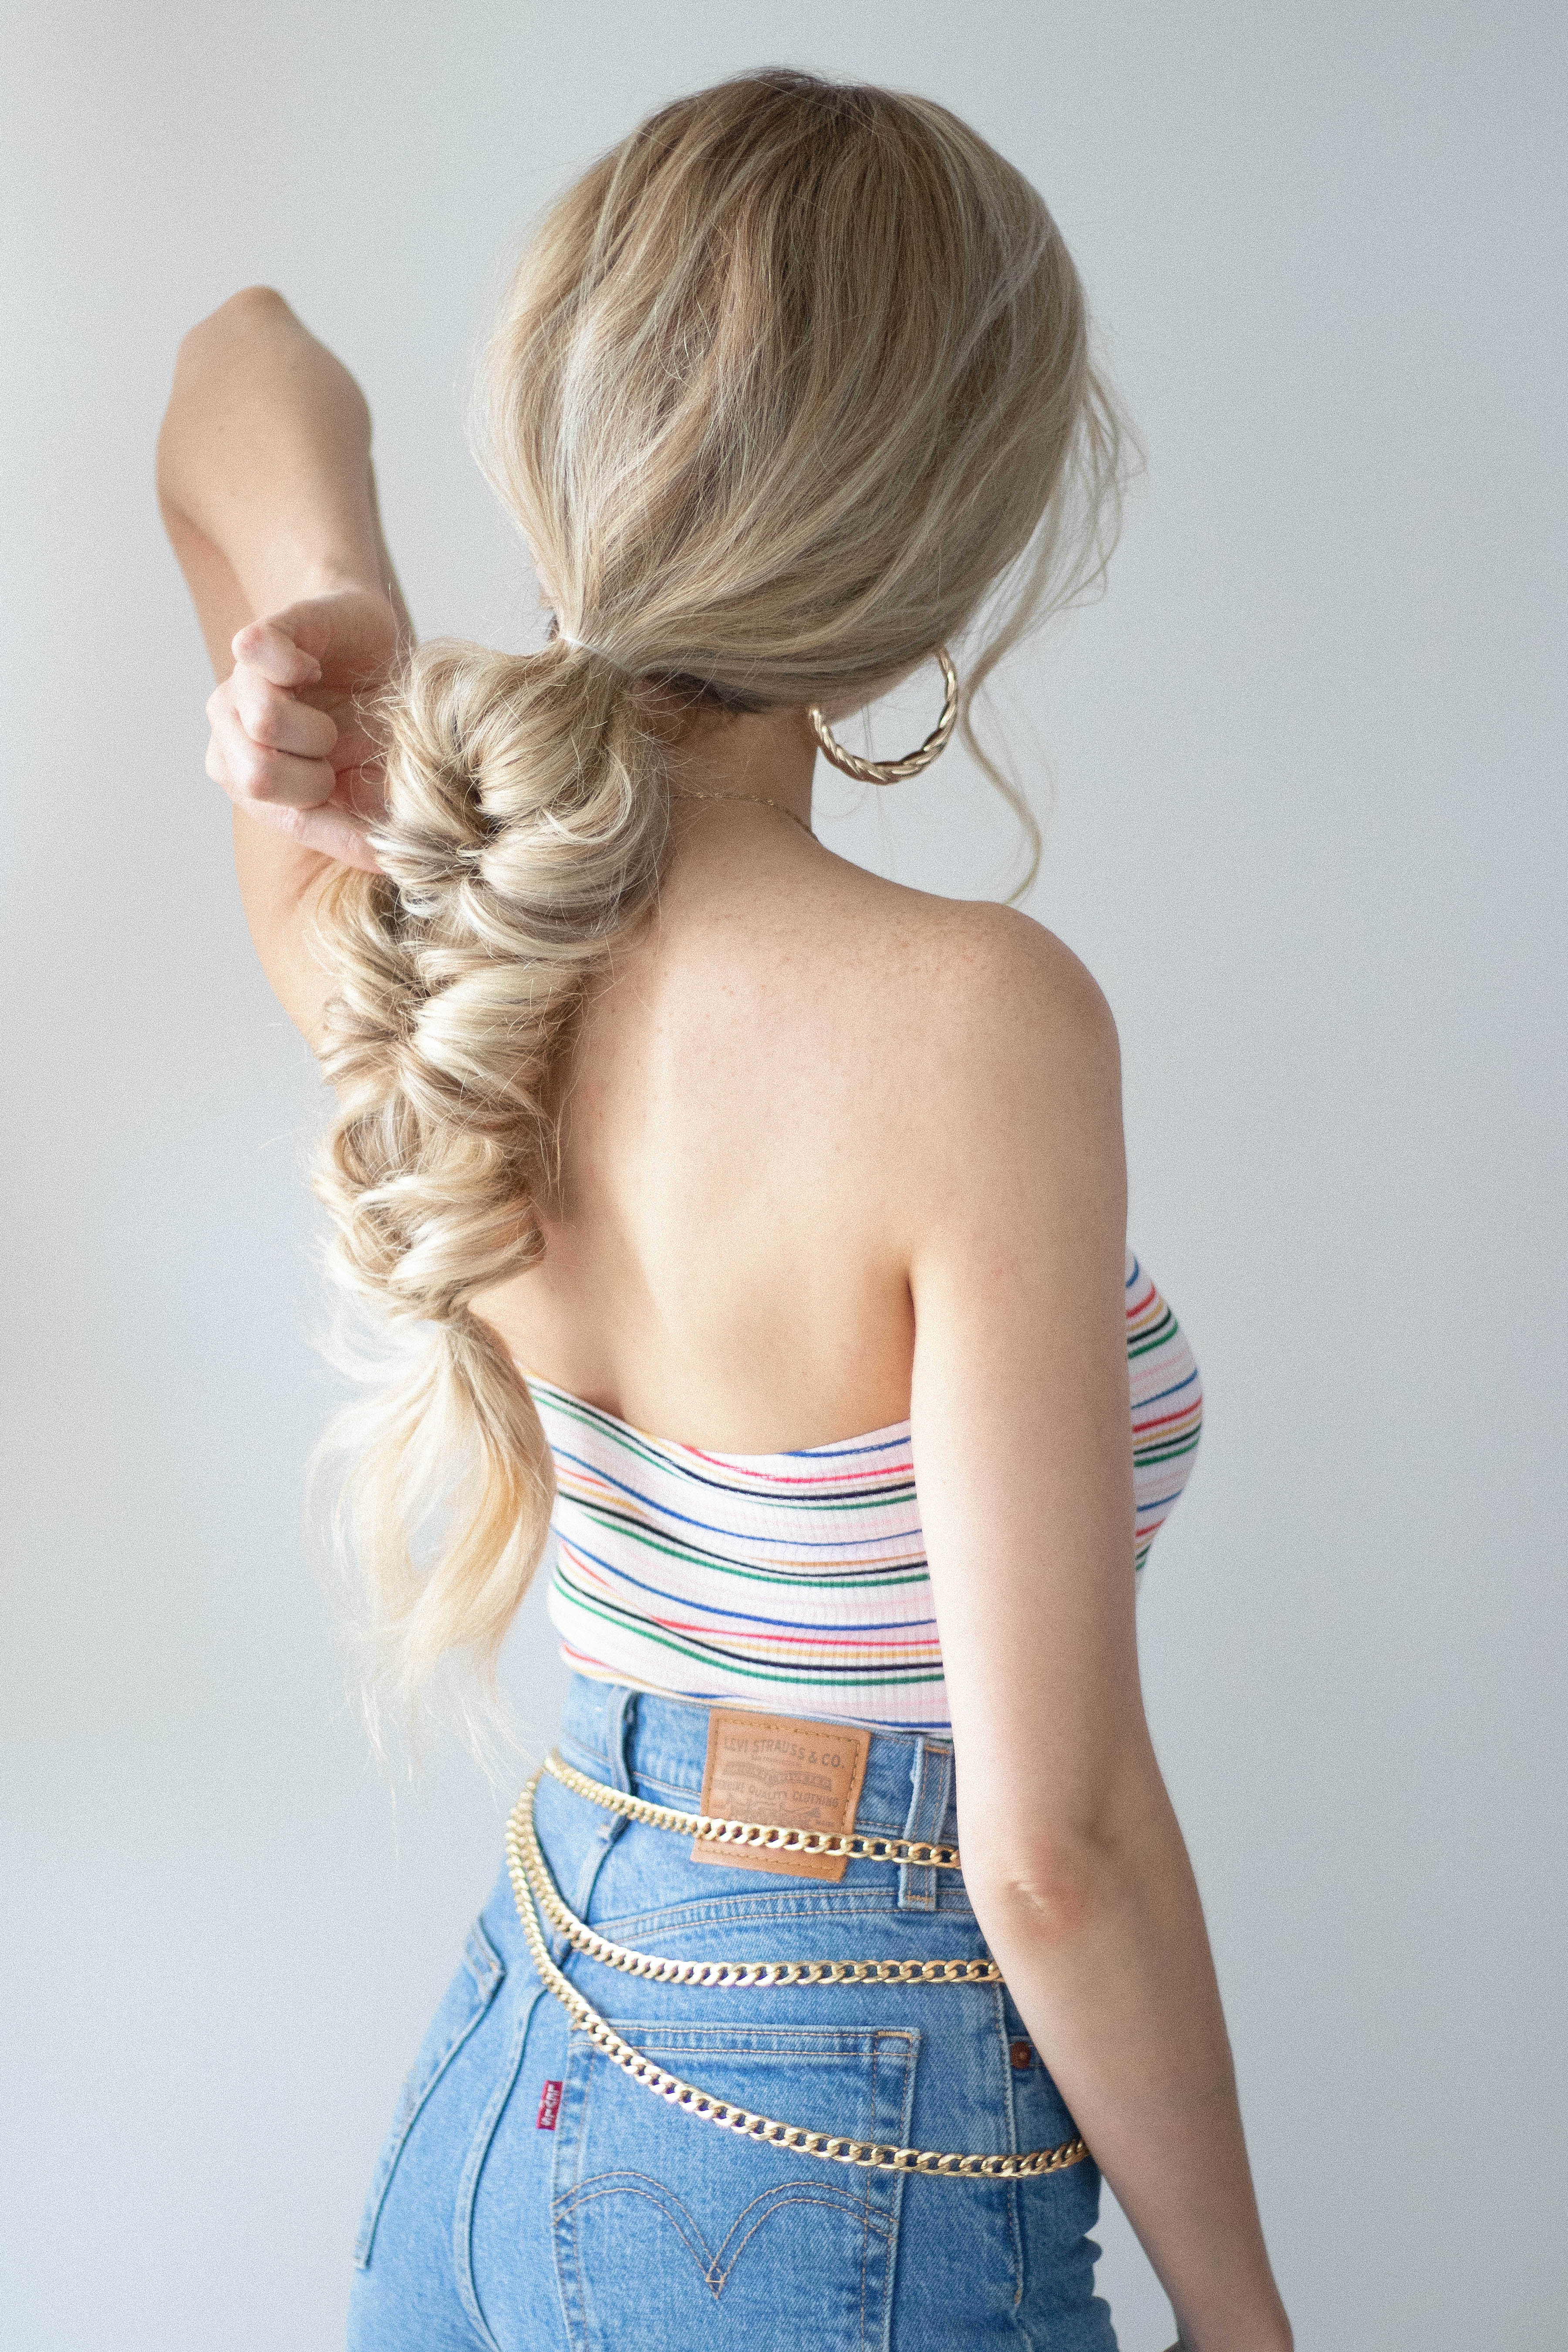
Effortless Bubble Braid (My favourite!):
Step 1: For a VERY voluminous pony-tail clip together 2 4 clip wefts, and then placed them just below your temples.
Step 2: Loosely gather all your hair into a low pony-tail right at the nape of you neck, leaving out small pieces of hair to frame your face. (I felt quite brave using such a small elastic to hold all that hair, but it surprisingly held all day long!)
Step 3: Pinch and pull on small sections around your crown to add more texture & volume.
Step 4: Place another hair elastic about 4 finger widths down, depending on the length of your pony-tail you may want to place them closer.
Step 5: Once secure, use your index fingers and thumbs to create a hole in the middle of that section between the two hair elastics. Once you have your hole, flip your pony-tail upwards, and pull it all the way through the hole like a topsy tail.
Step 6: Now the fun part… Pinch & pull on the outside of the topsy to fan it out and add texture, I love how this completely transforms the look.
Step 7: To add more topsy tails, just place another elastic about 4 finger widths down, and then repeat steps 5 and 6.
WEARING LUXY HAIR EXTENTIONS (20″ 220G Ash Blonde)
Use promo code: “LX-ALEXG” FOR $ OFF
No Comments